It happens every year in homes all over the country where pools or home spas are located…
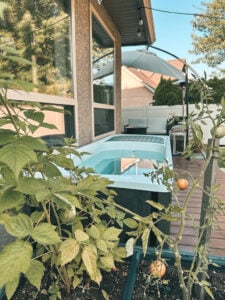
For months, you’ve been looking forward to crystal clear pool water, lazy afternoons, tropical drinks poolside, watching the kids splash around, and more, because you have a backyard pool.
How do you open the season? Host a big pool party? Have intimate drinks and candlelight poolside after the kids go to bed? But how do you know if that pool of yours is truly ready for another season? Answer: You test the pool water.
Even if you don’t own a pool, you might already be somewhat familiar with the basics: pH balance, chlorine levels, etc. Do you own a saltwater pool? Then you’ll need to know about salt levels. What about phosphates?
Don’t forget about possible contaminants like calcium, iron, and copper. You could be in for an unsightly appearance, not to mention potential damage, if you leave your pool vulnerable by ignoring the water checks necessary.
The best course of action when you need your pool tested, cleaned, troubleshot, and basically cared for, is to trust it to pool cleaning specialists.
That aside, however, knowing how to test your pool water is something every pool owner should be familiar with.
Here are some tips…
1. Accurate Testing
It’s really not as complicated as you might think to test the water in your pool. When it comes to options, testing can be done in several ways:
- Your local pool store
- Test strips
- Liquid test kits
- A professional service who comes to your home
2. Taking Samples
How you take your pool water sample and from where you take it are important factors. If you can, right from the middle of the pool is the best place to obtain a sample.
- If you’re taking your sample elsewhere for testing, make sure the sample bottle or cup has a tightly fitting cap.
- To take the sample, so the opening faces the pool floor, hold your container upside down.
- About elbow deep, insert the container, then, to collect the sample, turn it right side up.
- Avoid taking your sample close to any return jets or skimmer opening.
3. Liquid Test Kits
A basic liquid test kit is all that’s really needed for regular maintenance. To test pH and chlorine, make sure it includes fennel red and OTO (orthotolidine).
- Use the test kit collection container to get your sample.
- Add the specified number of fennel red drops to the water on the side designated for pH testing.
- Add the specified number of OTO drops to the water on the side designated for chlorine testing.
- Compare the water sample colors to the collector’s water scales by holding it up against a white background. A high pH is designated by redder water. A higher chlorine level is designated by yellower water.
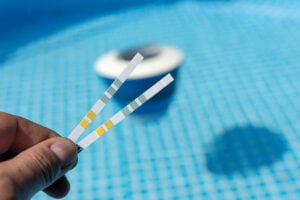
4. Test Strips
Compared to liquid test kits, test strips can sometimes be more accurate. Besides that, they are easy and quick to use. Additionally, compared to liquid kits, they are usually less expensive. You do, however, go through them relatively quickly.
- Collect your sample of pool water.
- Quickly, in and out, dip a strip in the sample.
- For about 15 seconds, simply hold it in the air.
- Match the colors between the packaging and the strip.
- You can now adjust the chemicals in your pool according to the results.
Note: Earlier, we mentioned some pretty specific testing. The strips just mentioned can be used for general checks: chlorine, alkalinity, pH. You can buy specialty strips to test for things like salt, iron, and copper.
5. Leave the Testing of Your Pool Water to the Professionals
Need your pool properly cared for? Trust the knowledgeable professionals at AquaVision Pool & Spa!
From equipment replacement to troubleshooting to liners to weekly cleaning – and pretty much anything else involving pools and spas – our certified service department is here for you.
Got questions? Would you like to set up pool maintenance? Contact us today for more information.